This is a tutorial to make a ladybug from felt. It's very easy to make one. You can use it as decorations for your herbs pots, for kids room, for your kitchen or ... you can make one just for fun. I use them to sew them on the kids banners.

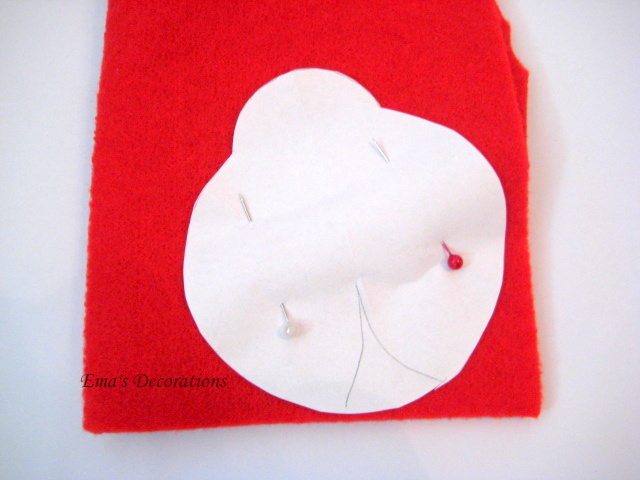
*Draw a ladybug contour on a sheet of paper: a big circle and a small one for head. You can copy my shape, if you want. Cut along the line and fix it on the sheet of felt.

*Cut along the ladybug contour.

*Make 2 pieces.

*Fold one piece and cut a small triangle to make wings.

*Cut a black triangle, but try to make bigger than the red one that you already cut. If this black triangle is bigger, you can sew it easily.

*Sew small bead on the one piece of red felt.

*Or sew big ones.

*Sew the eyes ... 2 small black beads ...

*And sew antennas with 6 small black beads.


* Sew the black triangle.

*Then sew the both red felt pieces together.

* Stuff with polyester and finish to sew.

* It's done!
* Find a place for them.

If you have any questions, please leave a comment.

Materials you need: black and red felt, polyester for stuffing, big and small black beads, red and black thread, needle, scissors.
*Draw a ladybug contour on a sheet of paper: a big circle and a small one for head. You can copy my shape, if you want. Cut along the line and fix it on the sheet of felt.
*Cut along the ladybug contour.

*Make 2 pieces.

*Fold one piece and cut a small triangle to make wings.


*Sew small bead on the one piece of red felt.

*Or sew big ones.

*Sew the eyes ... 2 small black beads ...

*And sew antennas with 6 small black beads.

* Put 6 beads on the thread, then insert your needle after the first one through the others five and fix on the head.

* Sew the black triangle.

*Then sew the both red felt pieces together.

* Stuff with polyester and finish to sew.

* It's done!
* Find a place for them.

If you have any questions, please leave a comment.


No comments:
Post a Comment